Converting Tourist Visas to ITAS Onshore: Is It Possible in 2026?
One of the most stressful realizations for any expat is landing in Bali or Jakarta on a simple holiday visa, falling in love with the rhythm of life here, and suddenly realizing that your 30 or 60 days are ticking away while you scramble to find a legal way to stay. I remember sitting in a humid cafe in Canggu back in the day, staring at my passport and wondering if I’d have to book a "visa run" to Singapore just to change my status. This guide explains exactly how the onshore conversion process works so you can avoid that frantic airport dash.
The Evolution of Onshore Visa Conversions in Indonesia
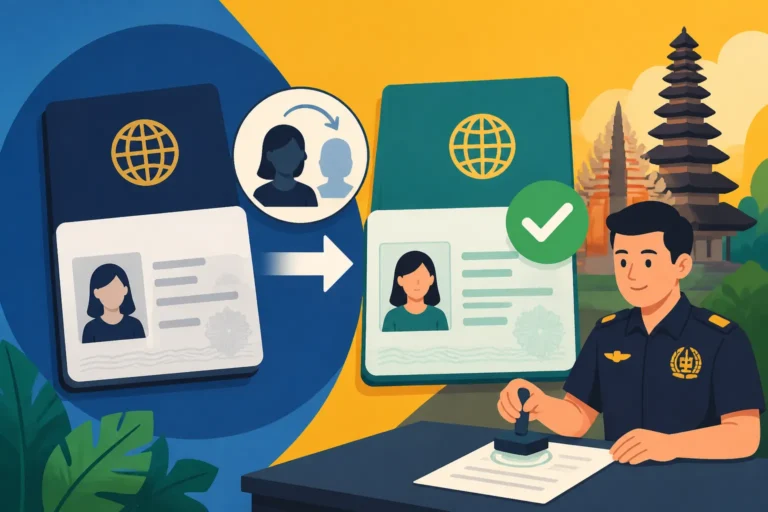
The landscape of Indonesian immigration has shifted dramatically over the last few years, moving away from the era of "visa runs" and toward a more integrated digital system. The Directorate General of Immigration has doubled down on the "Molina" (Modul Lalu Lintas Orang Asing) platform, which has effectively digitized the bridge between being a visitor and becoming a resident. Historically, if you wanted to switch from a tourist to a resident, you almost always had to leave the country, apply at an Indonesian embassy abroad, and then re-enter. Today, the "onshore" application—applying while your feet are still on Indonesian soil—is the gold standard for those who meet specific criteria.
The Post-Pandemic Shift and the Molina System
The digitalization of the immigration process wasn't just a reaction to global health events; it was a deliberate move to increase transparency and reduce the "under-the-table" dealings that used to plague local offices. The Molina portal now handles the vast majority of status changes. If you are currently on a B211A visit visa, you can initiate a status change to an ITAS (Izin Tinggal Terbatas) directly through the portal without ever visiting a local "Kantor Imigrasi" until the very final step of biometrics. This is a massive relief for those of us who remember the days of five separate trips to the immigration office just to get one stamp.
Why the Old Visa Run is Becoming Obsolete
While some old-school expats still swear by the "quick trip to Singapore," the Indonesian government is actively discouraging this. By making onshore conversions more accessible, they are encouraging foreigners to stay within the country and contribute to the local economy rather than spending their "conversion budget" on foreign flights and hotels. Furthermore, the 2026 regulations have tightened the rules on how many times you can enter on a Visa on Arrival (VoA) and B211A Tourist Visas: What You Can and Cannot Do. If immigration suspects you are living here on back-to-back tourist visas, you might find yourself in a "secondary inspection" room at the airport. Converting onshore proves your "intention to stay" is legitimate and documented.
The Legal Framework for Status Changes in 2026
The legal basis for converting a visit visa to a limited stay permit is grounded in the principle of "Alih Status" (Status Switch). Under current law, not all visit visas are eligible for this switch. The most important factor is your sponsorship. Whether you are moving to a Remote Work Visa (E33G): Digital Nomad Requirements and Limitations or a marriage-based ITAS, the transition requires your existing visa to be "convertible." The government has streamlined this so that the moment your ITAS is approved onshore, your old visit visa is automatically voided, preventing any legal overlap or confusion that used to cause major headaches for the civil registry.
Eligible Visas for Onshore KITAS Conversion
Not every entry stamp is created equal. I’ve seen far too many newcomers arrive on the wrong type of visa, thinking they can just "upgrade" it later, only to find out they are legally blocked from doing so. Understanding the hierarchy of Indonesian visas is the first step to ensuring you don't have to pack your bags for a forced exit.
The B211A Visit Visa Your Best Starting Point
If you are planning to eventually transition to a residency permit, the B211A (often called the Single Entry Visit Visa) is your best friend. This visa is designed for business meetings, tourism, or "pre-investment" activities. Because it requires a sponsor (even if it's just a travel agency), it is considered a much more "solid" visa than the standard VoA. In 2026, the B211A remains the primary vehicle for onshore conversion. If you enter on this visa, the immigration system already has a record of your sponsor, making the transition to a KITAS Explained: Working, Dependent, and Investor Temporary Stay Permits significantly smoother.
Limitations of the Visa on Arrival for Onshore Status Changes
The Visa on Arrival (VoA), while convenient, is notoriously difficult to convert onshore. Technically, a VoA is meant for short-term tourism only. While there have been pilot programs in places like Bali to allow VoA-to-ITAS conversions for specific "Golden Visa" categories, the average expat should not count on this. If you arrive on a VoA and decide you want to stay for a year, you will almost certainly be told by immigration that you must leave, apply for a proper e-visa, and re-enter. To avoid this, many people use iVisa to check the latest specific entry requirements for their nationality before they even book their flight, ensuring they start on a convertible B211A instead.
The Role of the Remote Worker Visa E33G and Golden Visas
2026 has seen the maturation of specialized visa categories like the E33G (Remote Worker) and various "Golden Visa" tiers. These visas are specifically designed with onshore conversion in mind. For example, if you are working remotely for a company in London or New York, you can enter on a temporary visit visa and, once you’ve settled into your villa in Ubud, apply to switch to the E33G. This "remote work" status is a game-changer because it removes the need for a local Indonesian company to sponsor you, which was the biggest hurdle for digital nomads in the past.
| Visa Type | Primary Purpose | Onshore Conversion Eligibility | Duration Before Conversion |
|---|---|---|---|
| VoA (e-VoA) | Short Tourism | Highly Restricted / Not Possible | 30 – 60 Days |
| B211A Visit Visa | Business/Long Tourism | Fully Eligible | 60 – 180 Days |
| E33G Remote Worker | Digital Nomadism | Designed for Onshore Switch | 1 Year (Renewable) |
| Investor ITAS | Business Ownership | Highly Eligible | 1 – 2 Years |
The Step-by-Step Process of Converting Your Status
Once you’ve confirmed you have a convertible visa, the actual process of "Alih Status" begins. It’s a bit like a choreographed dance—if you miss a step or lose your timing, the whole thing falls apart. You need to be meticulous with your dates, especially since Overstaying Your Visa in Indonesia: IDR 1,000,000 Daily Fines and Deportation Risk is an expensive and stressful mistake that can jeopardize your entire application.
Phase 1 Obtaining the Necessary Sponsorship and Documents
The foundation of your conversion is your sponsor. If you are switching to a work KITAS, your employer (a PT PMA) must provide the RPTKA (Foreign Worker Utilization Plan). If you are switching to a spouse-sponsored ITAS, you’ll need your marriage certificate and your spouse’s ID. One of the most overlooked documents in 2026 is the Surat Domisili (Domicile Letter): How to Get it from the Village Head. Immigration wants to know exactly where you are sleeping. You’ll need to visit your local "Banjar" or village office to get this. Don't be surprised if the local official asks to see your rental contract or a letter from your landlord—they take residency very seriously these days.
Phase 2 Navigating the Molina Portal and Digital Submissions
Everything now happens on the Molina website. You (or your agent) will upload your passport, your current visa, your sponsor’s documents, and a proof of funds. The portal is much more stable than it was in its early days, but it still has its quirks. Make sure your passport scans are high-resolution and that you haven't cropped out the machine-readable zone (MRZ) at the bottom. Once you submit, you will receive a "Billing Statement." You can usually pay this through an Indonesian bank app or at a local post office. Once the payment is confirmed, your status shifts to "In Process," which legally protects you even if your original visit visa expires while you wait.
Phase 3 The Biometric Session at the Local Immigration Office
After the digital approval comes the "final boss" of the process: the biometric session. You will receive a notification to visit your local "Kantor Imigrasi." My best advice? Dress "Sopan" (politely). No flip-flops, no singlets, and no ripped jeans. If you show up looking like you just walked off the beach at Canggu, they might just send you home. You’ll have your fingerprints scanned, your photo taken, and your signature recorded. This is also when the officers might ask a few casual questions about your stay. Be honest and polite. Within a few days of this session, your e-ITAS will be emailed to you, and you are officially a resident.
Financial and Document Requirements for a Smooth Transition
The bureaucratic machinery of Indonesia thrives on "kelengkapan dokumen" (completeness of documents). If even one stamp is missing or one translation is unofficial, the whole process grinds to a halt. In my experience, being "over-prepared" is the only way to stay sane.
Proving Financial Solvency and Bank Statement Standards
For almost every onshore conversion, you must prove you can support yourself. The standard for a B211A to ITAS conversion is generally around $2,000 USD in a bank account. However, for the Remote Worker Visa, that threshold jumps to a whopping $60,000 USD annual income proof. Immigration is no longer satisfied with simple screenshots of your banking app. They usually require official PDF statements that show your name clearly and, in some cases, a bank reference letter. If your funds are in a foreign currency, they will calculate the conversion based on the exchange rate of the day, so keep a little "buffer" in there to account for currency fluctuations.
Dealing with Certified Translations and Legalization
If you are converting based on marriage or family ties, your foreign documents (like birth certificates or marriage licenses) must be translated into Bahasa Indonesia. This is a non-negotiable step. You cannot just use Google Translate and call it a day. You must use Certified Translators (Penerjemah Tersumpah) for Immigration Documents to ensure the paperwork is legally recognized. For those who need these documents fast and accurately from abroad, services like RushTranslate are frequently used by expats to handle the heavy lifting before the documents even reach Indonesian soil. Remember that since Indonesia joined the Apostille Convention, the old "legalization at the embassy" shuffle is often replaced by a simpler apostille stamp from your home country.
Health Insurance Requirements for Long-Term Residents
Indonesia has become much stricter about health coverage. While you may have used a basic travel policy to enter, a residency permit often requires more robust coverage. Immigration may ask to see proof of insurance that covers hospitalization and emergency evacuation. Many expats opt for Cigna Global because their policies are specifically designed to meet the "international standard" that Indonesian immigration officers recognize. Additionally, once your ITAS is issued, you are legally required to enroll in the local system. You should look into How to Pay BPJS Independently via GoPay, Tokopedia, or Minimarkets as soon as you get your residency card to stay compliant with local social security laws.
Common Challenges and Professional Advice
Even with the best preparation, things can go sideways. The "Indonesian way" involves a certain level of patience and the understanding that rules can sometimes feel like they are being interpreted differently depending on which office you visit.
Dealing with Technical Glitches and Payment Failures
The Molina portal is a vast improvement, but it isn't perfect. I’ve seen many friends get stuck on the "Payment Pending" screen for days because their foreign credit card was rejected by the Indonesian gateway. If this happens, don't keep clicking the button—you might end up with multiple charges or a locked account. The safest bet is to pay via a local bank (Mandiri or BCA) if you have an account, or ask a local friend to pay via their banking app using your billing code. Also, always clear your browser cache before starting a new application on the portal; the site is notoriously finicky with old cookies.
The Risk of Overstaying During the Conversion Process
The most common fear is: "What if my visit visa expires tomorrow and my ITAS isn't approved yet?" Legally, as long as your "Alih Status" application is submitted and the fee is paid before your current visa expires, you are in a "bridge" status. However, you cannot leave the country during this time. If you exit the country while your conversion is pending, the application is automatically cancelled, and you'll have to start over from scratch with a new entry visa. If you do find yourself in an overstay situation due to a technical error, go to the immigration office immediately. Being proactive is always better than being caught at the airport.
When to Hire an Immigration Agent vs Doing It Yourself
This is the eternal expat debate. In 2026, the system is "user-friendly" enough that a tech-savvy person can technically do it themselves. However, I still recommend using a reputable agent for your first conversion. An agent (or "biro jasa") knows the specific officers, the current "mood" of the department, and how to handle the inevitable technical glitches. They can also help you with the Health Checklist for Your First 30 Days in Jakarta or Bali to ensure you are meeting all the non-visa requirements like police reporting (STM) and local registration. If you do choose an agent, make sure they are licensed; a "cowboy" agent can disappear with your passport, leaving you in a legal nightmare.
Navigating the 183-Day Rule and Tax Implications
One thing many people forget when they convert to an ITAS onshore is that they are no longer just "tourists" in the eyes of the tax office. Once you have a residency permit and spend more than 183 days in the country within a 12-month period, you are technically a tax resident of Indonesia. This means you may be required to obtain an NPWP (Tax ID) and report your income. While this sounds scary, Indonesia has many Double Taxation Agreements (DTAs) that prevent you from being taxed twice on the same income. Just be aware that the moment you move from a visit visa to an ITAS, your "financial footprint" in Indonesia becomes much more visible to the authorities.
Understanding the Impact of Regional Differences on Conversion
While the immigration law is national, the "vibe" and speed of processing can vary significantly between regional offices. Converting your status in South Jakarta (Kanim Jaksel) is a very different experience than doing it in Labuan Bajo or North Bali. The Jakarta offices are used to corporate types and high volumes, so they are incredibly efficient but very "by the book." In contrast, smaller regional offices might have fewer staff and take longer to process the biometrics, but they are often more approachable if you have a unique situation. Always check the local Google Maps reviews for the specific "Kantor Imigrasi" you'll be visiting—the expat community is very vocal about wait times and officer attitudes.
Disclaimer
The information provided in this guide is for general informational purposes only and does not constitute legal or professional immigration advice. Immigration laws and regulations in Indonesia are subject to frequent changes, often without prior notice. While every effort has been made to ensure the accuracy of this information for the year 2026, readers are strongly encouraged to consult with a qualified immigration professional or the official Directorate General of Immigration website before making any residency decisions.